If you are running a WooCommere store, you need a reliable payment gateway for transactions.
And PayPal is the most popular, easy-to-use and trusted payment method by millions of WooCommerce stores.
But integrating PayPal has now become more tedious due to updates. So here we’ll see how to connect the WooCommerce PayPal Payments plugin to your store.
We’ll also see how to manage multiple PayPal and WooCommerce accounts from a single place to gain business insights and analytics.
Why use PayPal Payments for WooCommerce?
Earlier, when you install WooCommerce, you also get the PayPal Standard extension. But with WooCommerce version 5.5.0, PayPal Standard is hidden for new installations.
WooCommerce recommends using the PayPal Payments extension which is their full-stack solution.
If you are using the older PayPal payment method, here are the details to upgrade.
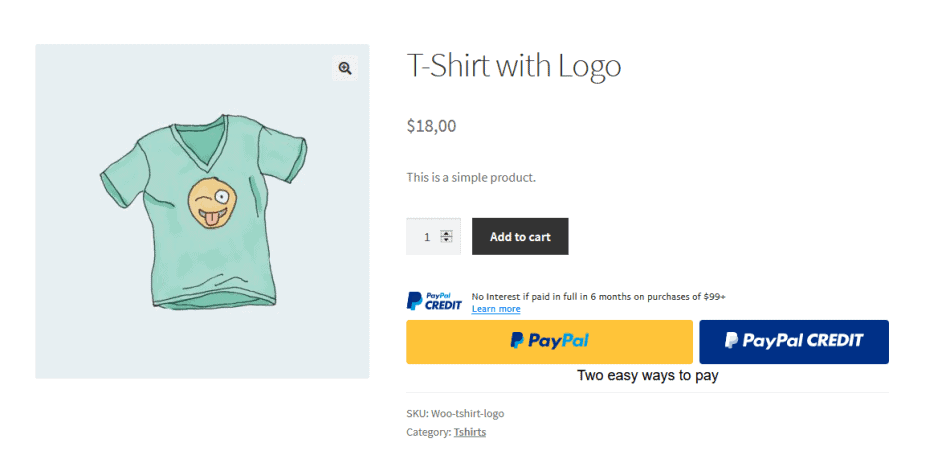
- All-in-one checkout solution – you can offer PayPal, Venmo (US only), Pay Later options, advanced credit and debit card processing, and local payment methods.
- With smart payment buttons, you can offer your customers relevant payment options that are specific to their respective markets.
- Compatible with WooCommerce Subscriptions.
- Advanced Card Payments with fully customizable card fields.
- Supports 100+ currencies
- It’s free
Requirements to set up PayPal for WooCommerce
- WordPress Version 5.3 or above
- WooCommerce Version 3.9 or above
- PHP Version 7.2 or newer
- WooCommerce PayPal Payments plugin (mentioned above)
- PayPal business or personal account
How to Add PayPal to WooCommerce?
We assume that you have installed the required versions of WooCommerce, WordPress and PHP. Let’s see how to configure the plugin and your PayPal business account.
Enable PayPal as a payment method
Previously, the PayPal payment method was automatically available after installing WooCommerce. However, it now requires you to install and activate the WooCommerce PayPal Payments plugin.
- Log in to your WordPress Admin. Install and activate the plugin like you do for any WooCommerce plugin.
- After activating, go to
WooCommerce > Settings > Payments. You will see the PayPal payment method added to the list of available options. - Toggle the switch to turn on the PayPal payment method and save your changes.
- On the next page, you will see two options for connecting to PayPal: automatic and manual. Click on the
Toggle to manual credential inputoption to enter accurate details. Some new fields will be added. - There is also the
Sandbox optionto test your WooCommerce PayPal connection before making it accessible to the public. More about it later.
Now, it’s time to gather the necessary credentials from your PayPal account.
Get credentials from your PayPal business account
To set up PayPal checkout in your WooCommerce store, you need a PayPal business account.
If you don’t have one already, you can create a new account here.
- Log in to your account. Hover over your name on the top right corner and click on
Account Settings. - Under
Business Profile, click onBusiness information. You’ll get the PayPal Merchant ID. - Next you need the client ID and the secret key. Click on
Developerin the top panel of your account dashboard. - This will take you to the developer account dashboard. Hovering over your name on the top right corner and click on
Dashboard. - Click on the
Livetab under theMy apps & credentialssection. - Click on the
Create Appbutton. - Give a name to this app and again click the Create App button.
- You’ll now see the client ID under the
Live API credentials. Click onShowunder theSecretfield to reveal the secret key. - Copy and paste your merchant ID, client ID and the secret key on the PayPal Checkout page in your WordPress dashboard and save your changes.
- WooCommerce will then show additional settings to customize the PayPal checkout experience on your site.
- Check the
Enable the PayPal Gatewaybox at the top of the page.
That’s it. You’ve configured your site’s PayPal checkout!
Configure Additional WooCommerce PayPal settings
You can configure many settings here. For time being, we’ll configure for PayPal Identity Token. This token helps the merchant verify the payment’s legitimacy and confirms that it was made through PayPal, avoiding potential errors and fraud risks.
Steps to get PayPal Identity Token
A PayPal identity token is a distinct code or security feature that authenticates a user’s PayPal account with WooCommerce, providing secure communication between the two and validating the authenticity of PayPal payments.
- Log in to your PayPal account.
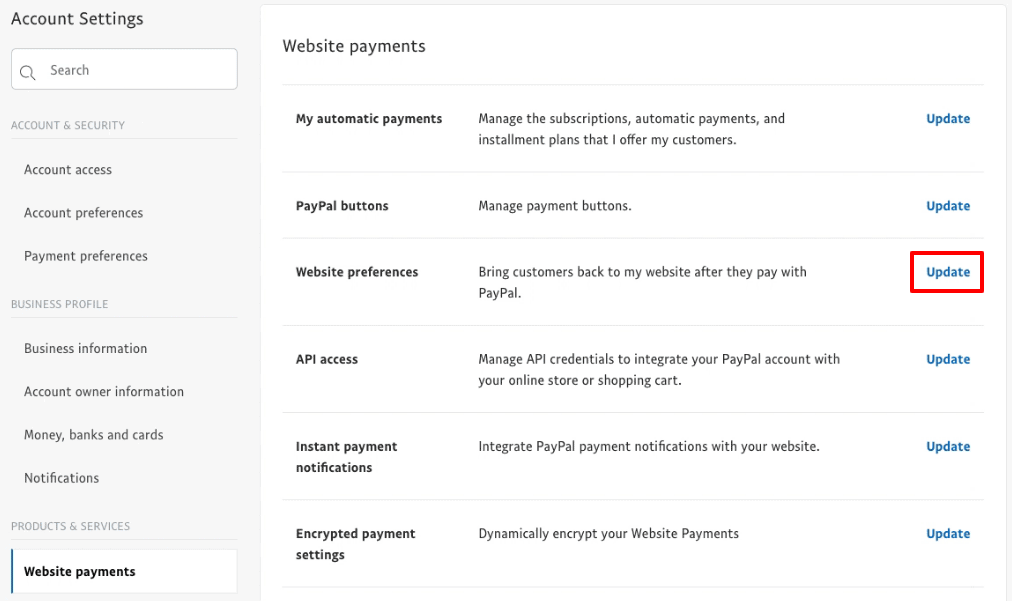
- Go to
Account Settings > Website payments. - Under
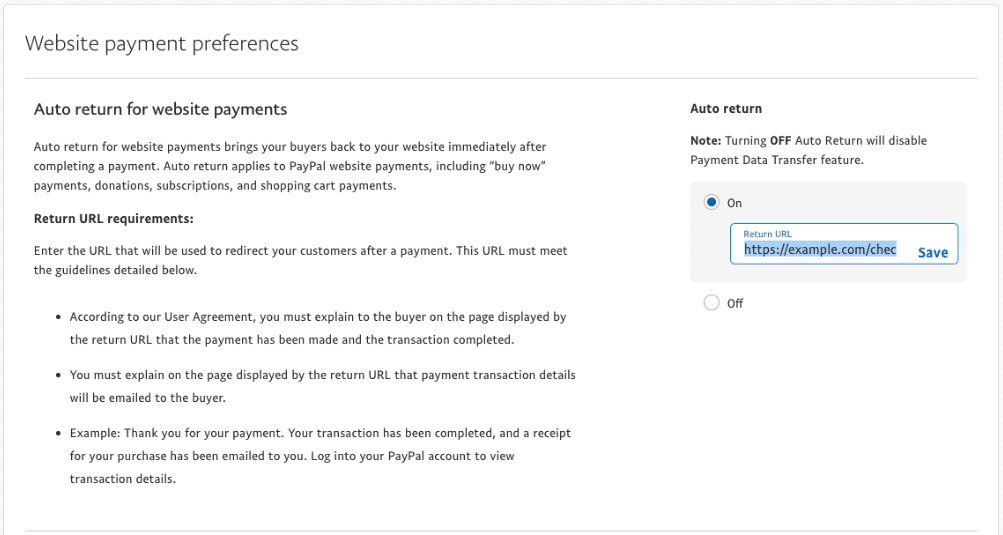
Website preferences, click on the Update link. - Select On under
Auto return for website payments. - Insert your store Thank You Page link to the Return URL field.
- Next, under
Payment data transfer, select On. - You should see your Identity Token listed at the bottom.
- Copy the Identity Token to your clipboard.
- Now, go to your WordPress Admin panel > WooCommerce > Settings > Payments.
- Click on the PayPal payment gateway.
- Paste the Identity Token into the PayPal identity token field.
- Click the Save changes button.

Test purchase with PayPal Sandbox account
As mentioned above, PayPal allows you to test payments and checkout without spending any real money. This help you identify for any flaws and resolve them before going live with actual checkout.
Refer to this PayPal sandbox testing for more details.
Great job! Your WooCommerce store is now capable of securely communicating with PayPal and handling payments through the PayPal payment gateway.
Better and accurate analytics for WooCommerce and PayPal at one place
Every WooCommerce store requires analytics to monitor and expand their business, as basic KPIs can only be obtained by relying on WooCommerce or PayPal alone.
Moreover, if you have multiple WooCommerce stores or PayPal accounts, you will have to log in to each account to view reports, which do not give you the entire business performance.
However, with Putler, you can monitor all of your multiple WooCommerce stores and Putler accounts from a single location. Putler will automatically collect the data, merge it, and provide you with consolidated reports from all your stores in a single location.
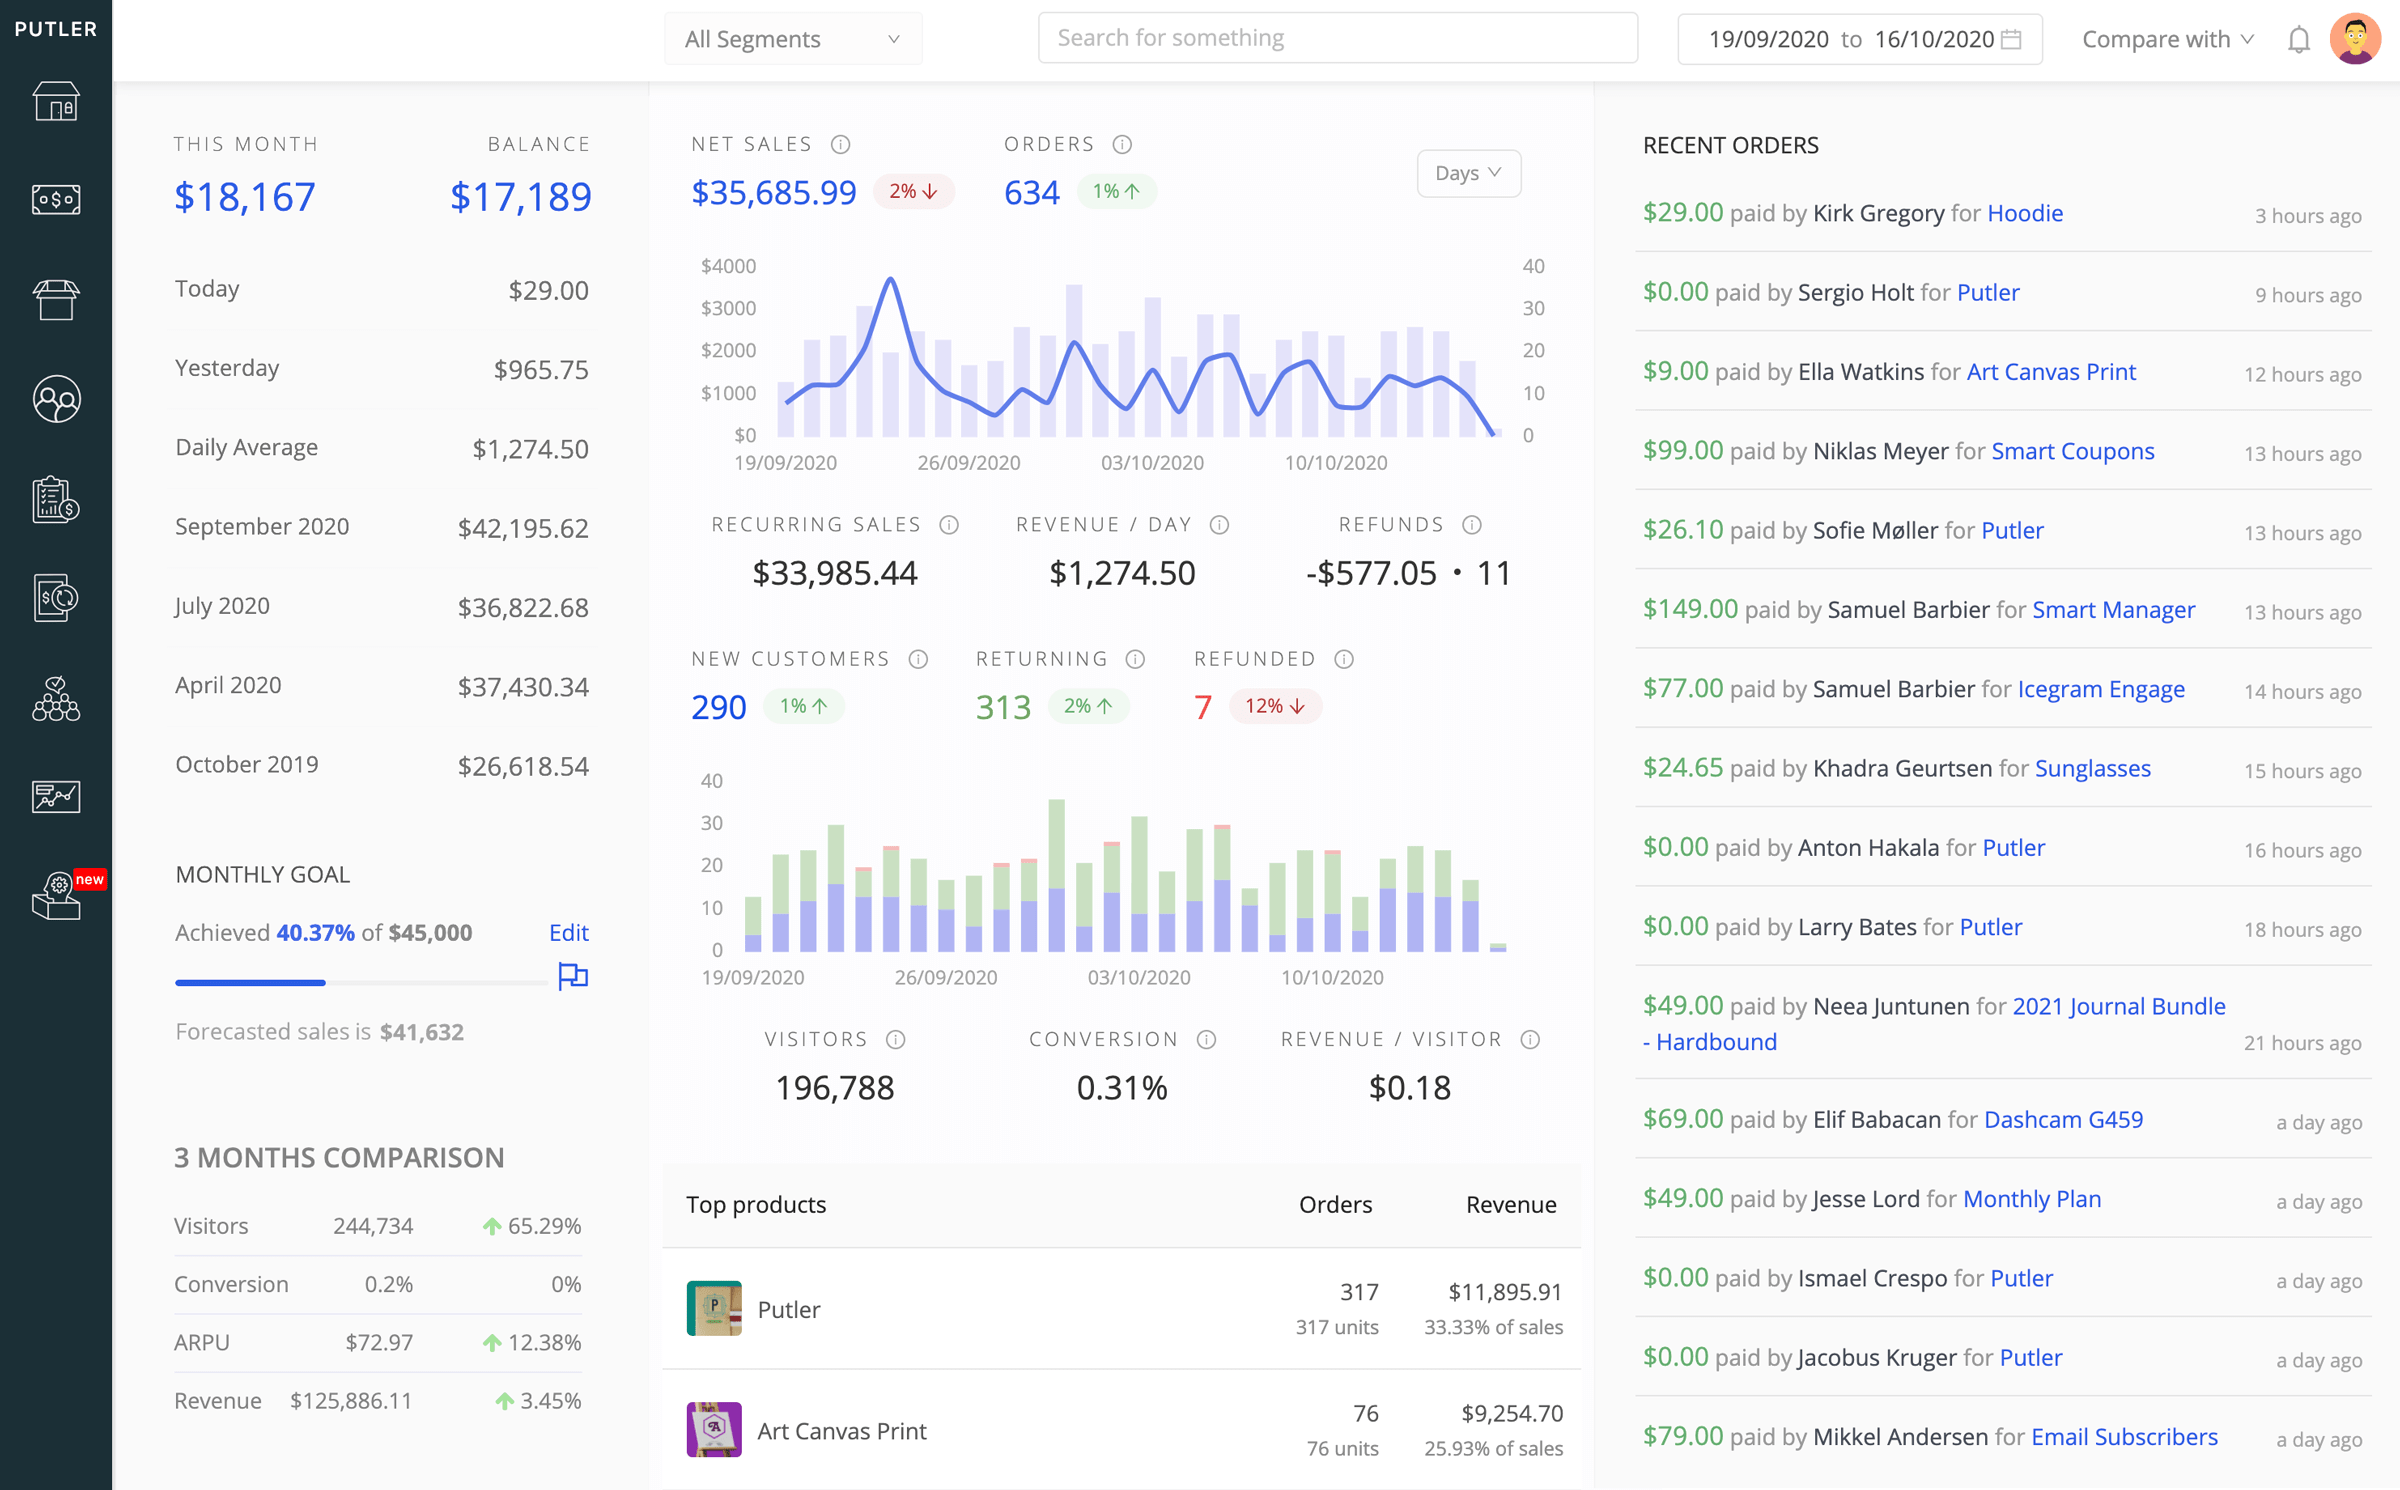
- Switch between WooCommerce shops and PayPal accounts to view individual reports from each and also access combined reports for all your stores.
- Access over 150 KPIs and real-time metrics that truly indicate how your businesses are performing.
- Obtain comprehensive reports on all aspects, including products, customers, sales, transactions, subscriptions, and website audience.
- Connect unlimited stores/accounts for multiple platforms as well – Shopify, Stripe, BigCommerce, Google Analytics to stay on top of your business numbers with Putler.
- Effortlessly manage refunds, subscriptions, and balance tracking from one place.
Conclusion
I hope this blog clarifies how to enable PayPal for your WooCommerce store.
And if you desire to expand your WooCommerce business with precise and up-to-date analytics, Putler can aid you in steering your business in the right direction.