
All WooCommerce stores need reliable payment solutions for smooth transactions and fraud prevention.
Stripe is one such payment gateway popular for its ease of use, low transaction fees, and support compared to other providers.
In this blog, we’ll discuss how to add Stripe to your WooCommerce store in easy steps, so you can accept payments and allow customers to pay with Stripe.
And how you can connect your WooCommerce and Stripe accounts to get better business analytics.
WooCommerce Stripe payment gateway
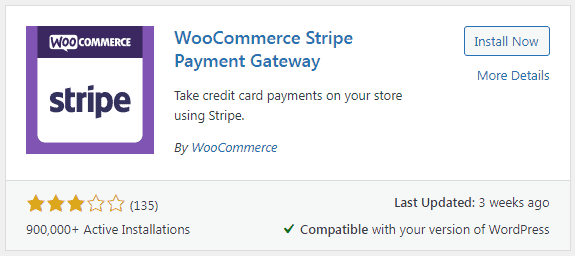
You need to install the free Stripe plugin developed by the WooCommerce team. The plugin has a rich feature set to easily accept and manage payments:
- Customers can complete their purchases without being redirected to an external checkout page, which can lead to an improved conversion rate for your store.
- There are no setup fees, monthly fees, and hidden costs.
- Available in 40+ countries, supports 135+ currencies.
- Accepts all major credit and debit cards as well as local payment methods.
- Optimized for a seamless mobile experience with expedited checkout, offering support for Apple Pay, Google Pay, and Payment Request API.
- Compatible with WooCommerce Subscriptions to support recurring payments.
and many more…
WooCommerce users can benefit from Stripe as it’s an excellent option to accept payments for various products and services, including simple products, subscriptions, memberships, and more.
Requirements to set up Stripe for WooCommerce
Before moving to the setup, there are some pre-requirements:
- WooCommerce Stripe plugin that we saw above.
- SSL certificate – provides a secure encrypted tunnel for data transfer that is vital for sensitive customer information.
- Stripe account
- WooCommerce version above 2.2 as Stripe processes refunds only for the versions higher than 2.2.
How to Add Stripe to WooCommerce?
To get started with Stripe integration for WooCommerce, the first step is to create an account with Stripe, followed by the remaining steps.
Creating a Stripe account
Setting up a Stripe account is generally an intuitive process, although it may vary slightly depending on your country. You can simply follow the steps provided to get started.
- Create an account – Go to the Stripe website and click
Start Now. Fill in your email, full name, select the country, and create a strong password. When done, click onCreate Account. - Verify your email address – Go to your email account and click on the button that says
Verify email address. - Activate Payments – To be able to accept payments, it is necessary to go back to the Stripe account and click on the
Activate Paymentsbutton. - Add business basics – Enter your registered business address, type of business, and business structure.
- Add business details – Enter your legal business name or LLC name, employer identification number, registered business address and phone number. Also, select the type of industry that fits your business. Provide further information such as your business website and product description.
- Add details of business representative – Fill in the contact details of a representative from your company.
- Add business owners – If it’s appropriate for your company, fill in the details.
- Select fulfillment details – Select how long it will take your customer to receive/use your product or service.
- Add statement descriptor – This will show up in the statements your customer will receive. So, keep it easily identifiable. There is a character limit for this section.
- Enter bank details – Do it manually or select your bank and follow the instructions.
- Enable two-step verification – Choose between SMS or an authenticator app.
- Enable sales tax calculation – Optional step but it does help make taxation easy.
- Fill in additional information – Fill in anything else required on the next page. The information required in this step could differ based on the details provided in the preceding steps. Once you’re done, click Submit.
You’re now all setup and ready to receive payments.
Get Stripe API Keys
- Access your Stripe dashboard and go to the section labeled
Get Your API keys. - From there, you can copy and save both the
Publishable KeyandSecret Keyto use at a later time.
Install the Stripe WooCommerce plugin
- Go to your WordPress Admin panel > Plugins > Add New.
- Search for ‘Stripe WooCommerce’.
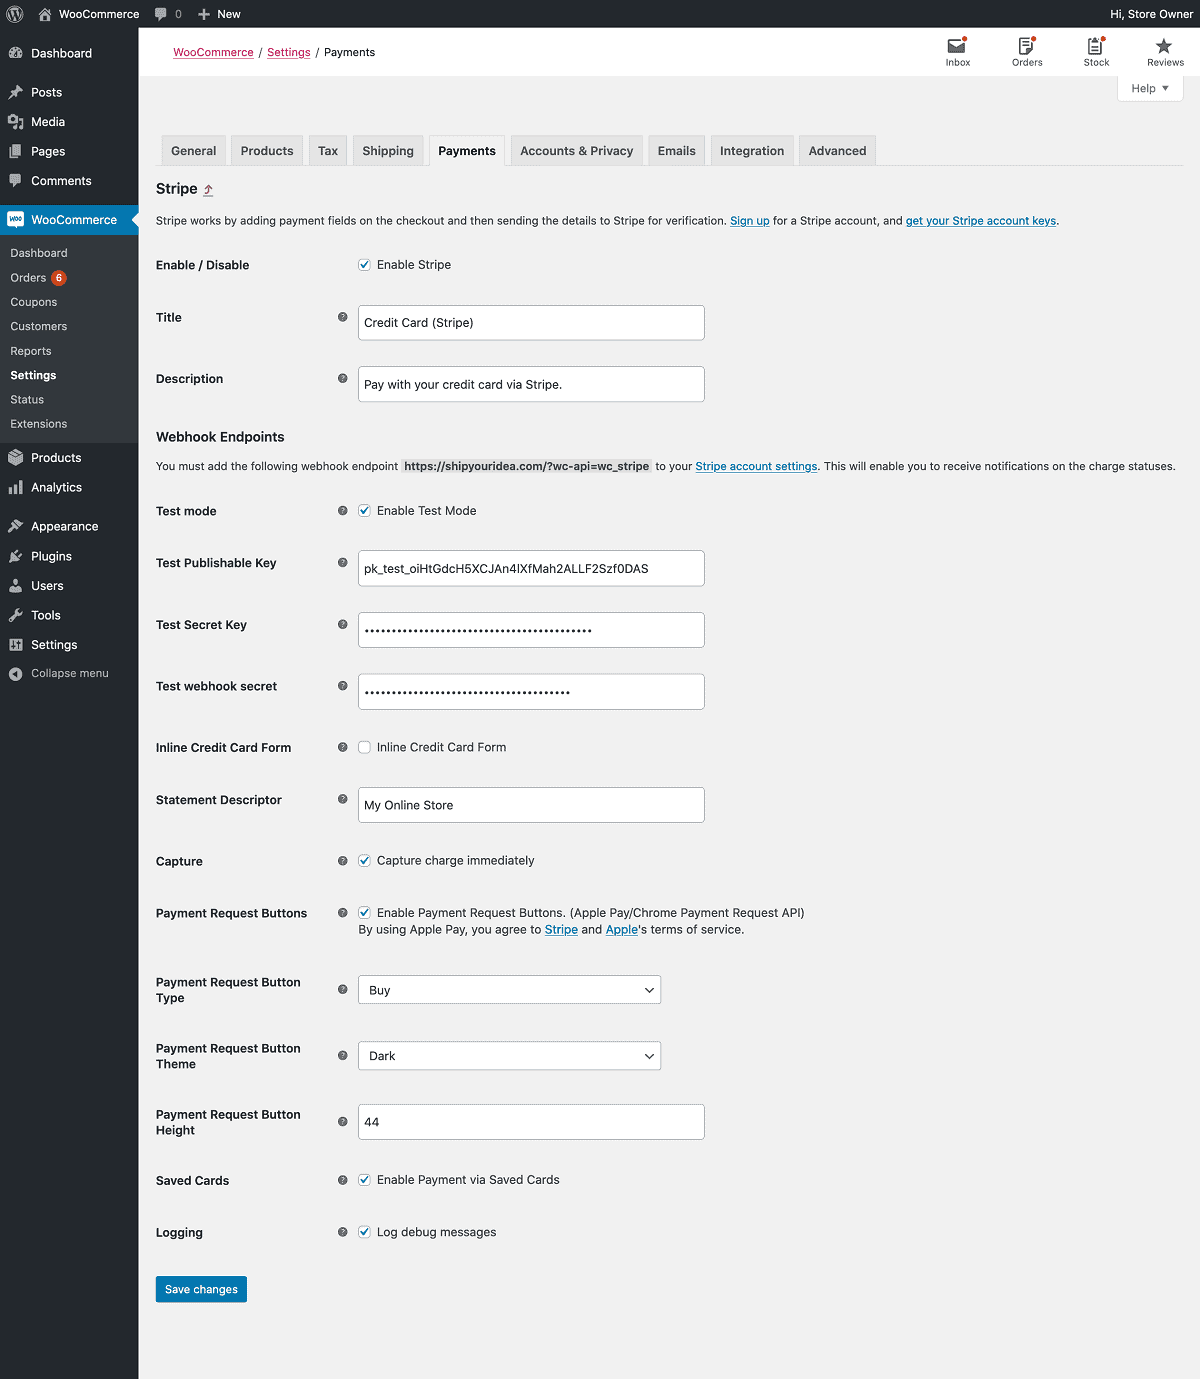
- Install and activate the ‘WooCommerce Stripe Payment Gateway’ plugin. Next, go to its settings for configuration. You’ll be taken to the WooCommerce Payments settings.
Configuring the Stripe WooCommerce plugin
- Navigate to the
Paymentstab and paste the Publishable and Secret keys that were previously copied from the Stripe dashboard. - Additionally, create a
Webhook Secret Keyby including the webhook endpoint in the Stripe dashboard. - Once the endpoint is created, the next step is to copy the
Webhook Signing Secretand paste it into the settings of the WooCommerce Stripe plugin. - Furthermore, you can customize the payment button’s text and color, enable Apple Pay payments, and turn on bug logging.
- Finally, save your changes by clicking the Save changes button to activate the payment gateway in testing mode.
Test the integration
- Add a product from your WooCommerce store and proceeded to checkout.
- You’ll see the options to pay via credit and debit cards. At the bottom right, it shows you’re in testing mode. It also gives the testing card information to test out the complete payment process.
- Pay for the product using the test credit card provided.
- Check the save payment option. The next time you visit this store, you don’t need to fill in the card information all over again.
To transition from testing mode to live mode, navigate to the plugin’s settings and deactivate Test Mode. Then, replace the test and secret keys with the LIVE keys.
That’s it. Your WooCommerce store is ready to accept payments with Stripe.
Better and accurate analytics for WooCommerce and Stripe at one place
Any WooCommerce store needs analytics to monitor and grow its businesses. If you rely on WooCommerce or Stripe alone, you are only viewing basic KPIs.
If you have multiple WooCommerce stores or Stripe accounts, you need to log in to each account to view reports. And remember, these reports do not give you your entire business performance.
Enter Putler and you can monitor all your multiple WooCommerce stores and Stripe accounts from a single place. Putler will automatically gather the data, merge it, and present you with consolidated reports from all your stores in a single location.
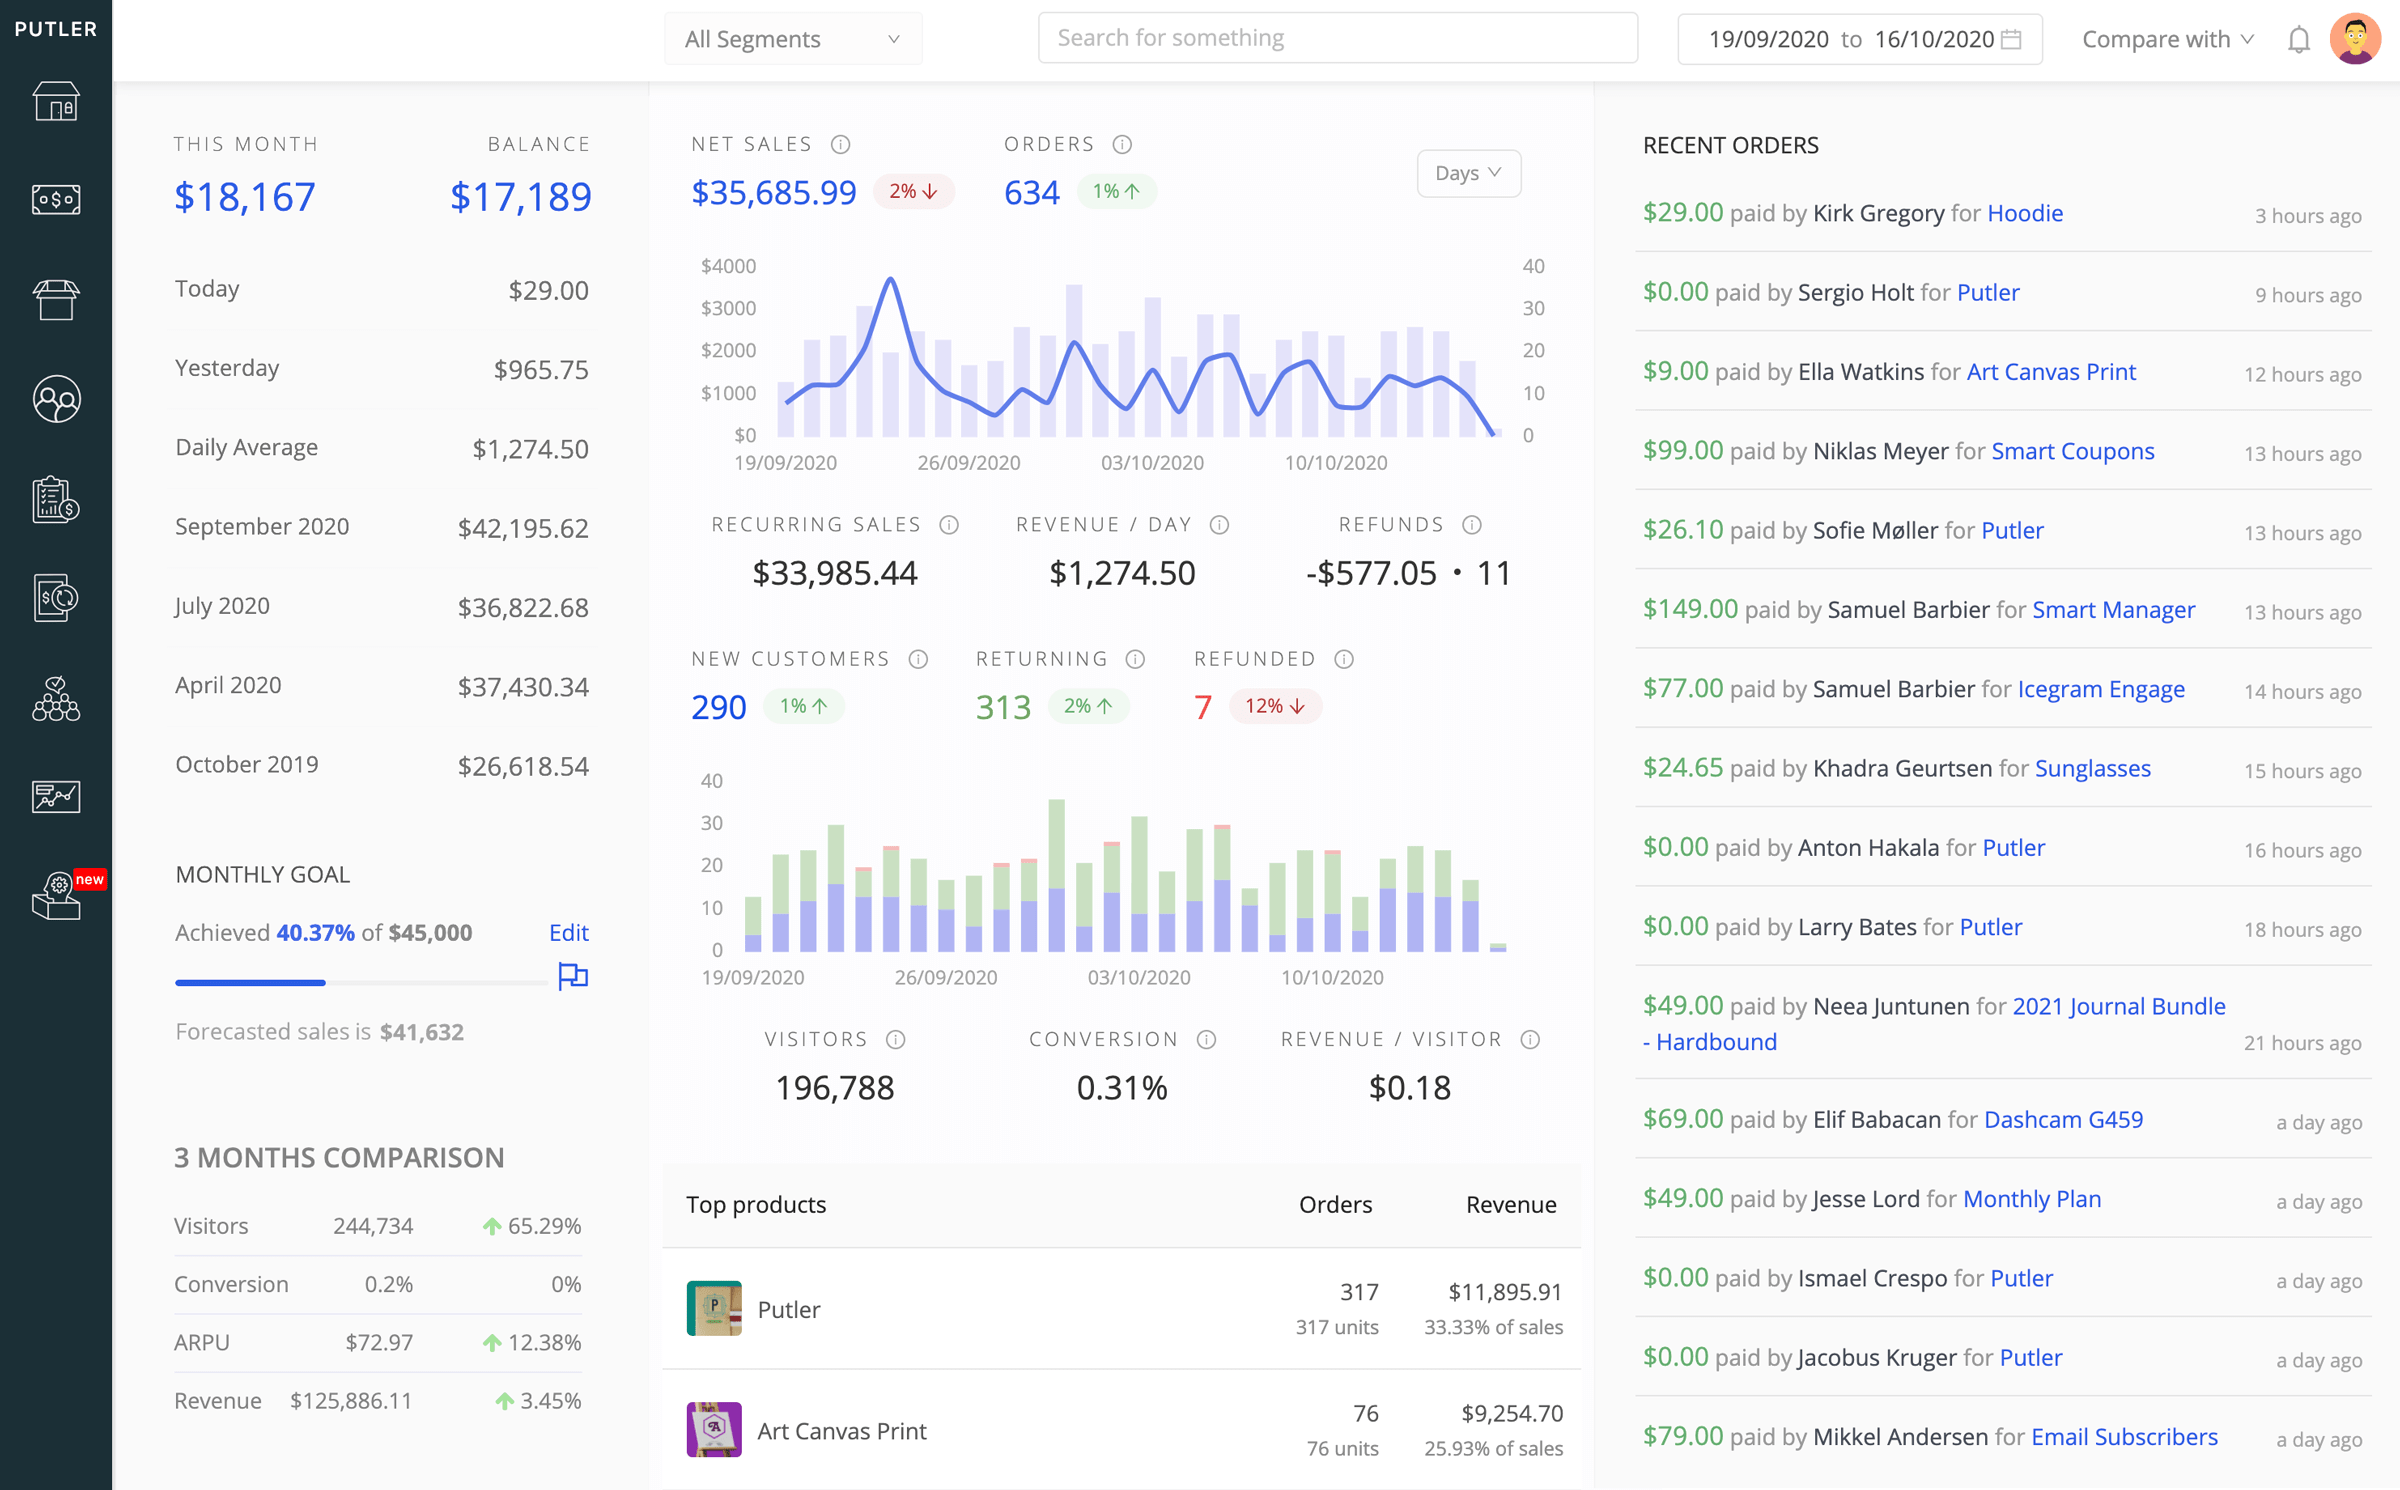
- Get access to 150+ KPIs and metrics that actually tell you how your businesses are performing in real time.
- Switch between WooCommerce shops and Stripe accounts to view individual reports from each.
- You can also view combined reports for all your stores.
- Get in-depth reports on all aspects – products, customers, sales, transactions, subscriptions, website audience.
- Easily manage refunds, subscriptions and balance tracking from one place.
- Connect unlimited stores/accounts for multiple platforms as well – Shopify, PayPal, BigCommerce, Google Analytics to stay on top of your business numbers with Putler.
- This also means you can use both Stripe and PayPal and get analytics for your WooCommerce stores.
Conclusion
I hope this blog clarifies why you need Stripe and how to connect Stripe to WooCommerce using the Stripe plugin.
And if you want to grow your WooCommerce business with accurate and real-time analytics, use Putler, which helps you take your business in the right direction.