
Is it possible to have multiple Authorize.Net accounts?
Let me cut straight to the chase – Yes, absolutely! You can have multiple authorize.net merchant accounts.
I know this might surprise some business owners who think payment processors prefer keeping everything under one roof, but Authorize.Net actually supports businesses having separate accounts for different purposes.
There’s no official limit on how many accounts one business entity can have. Each account operates as its own independent system with separate credentials, settings, and transaction histories.
Sounds interesting? Let’s dig deeper into multiple Authorize.Net accounts.
What are multiple Authorize.Net accounts?
Having Multiple Authorize.Net accounts actually means having completely separate merchant accounts with Authorize.Net – each one operating independently like separate businesses.
Here’s what makes each account unique:
- Separate API credentials for each account
- Independent merchant settings and configurations
- Distinct payment processing flows
- Individual compliance requirements
The crucial thing I learned is that user login IDs cannot be shared across multiple accounts – each account is truly its own separate entity.
Understanding the structure is one thing, but why would you want to go through the hassle of managing multiple accounts in the first place?
Benefits of having multiple Authorize.Net accounts
From my experience researching this, here are the real advantages of using multiple Authorize.Net accounts:
- Clear financial separation: Your accounting becomes crystal clear when each business unit has its own payment processing. No more sorting through mixed transactions during tax season.
- Risk isolation: If one account faces issues (like excessive chargebacks), your other accounts keep running smoothly. I’ve seen businesses save themselves major headaches this way.
- Customized settings: Each account can have fraud detection settings tailored to its specific business model and risk profile.
- Independent vendor relationships: You can negotiate different rates or work with specialized merchant service providers for each account type.
- Enhanced security: By keeping accounts separate, you limit the potential damage from any security incidents.
These benefits sound compelling, but before you dive in, you need to understand exactly how these accounts are organized and what you’re working with.
Multiple Authorize.Net account structure overview
Let me break down how these accounts are actually structured:
Payment gateway ID: Each account gets a unique identifier, think of it as your account’s fingerprint in the Authorize.Net system.
User role system: Authorize.Net multiple user accounts feature provides five customizable roles for better access control:
- Account owner: Full access to everything
- Account administrator: Nearly full access (can’t manage other Account Owners)
- Transaction manager: Handles daily processing and reporting
- Account analyst: Read-only access to reports
- Account contact: Email notifications only
API credentials: Each account gets its own set of digital keys.
- API Login ID: Your API username
- Transaction Key: Your API password
- Signature Key: Optional extra security layer
Independent relationships: Each account typically needs its own merchant service provider relationship. Authorize.Net handles the gateway, but you’ll need separate arrangements for the actual money movement.
So that’s the complete picture of multiple Authorize.Net accounts. It’s a powerful solution for businesses needing clear separation, but it definitely comes with complexity you’ll want to plan for carefully.
Ready to get started? Here’s your step-by-step roadmap to creating multiple Authorize.Net accounts.
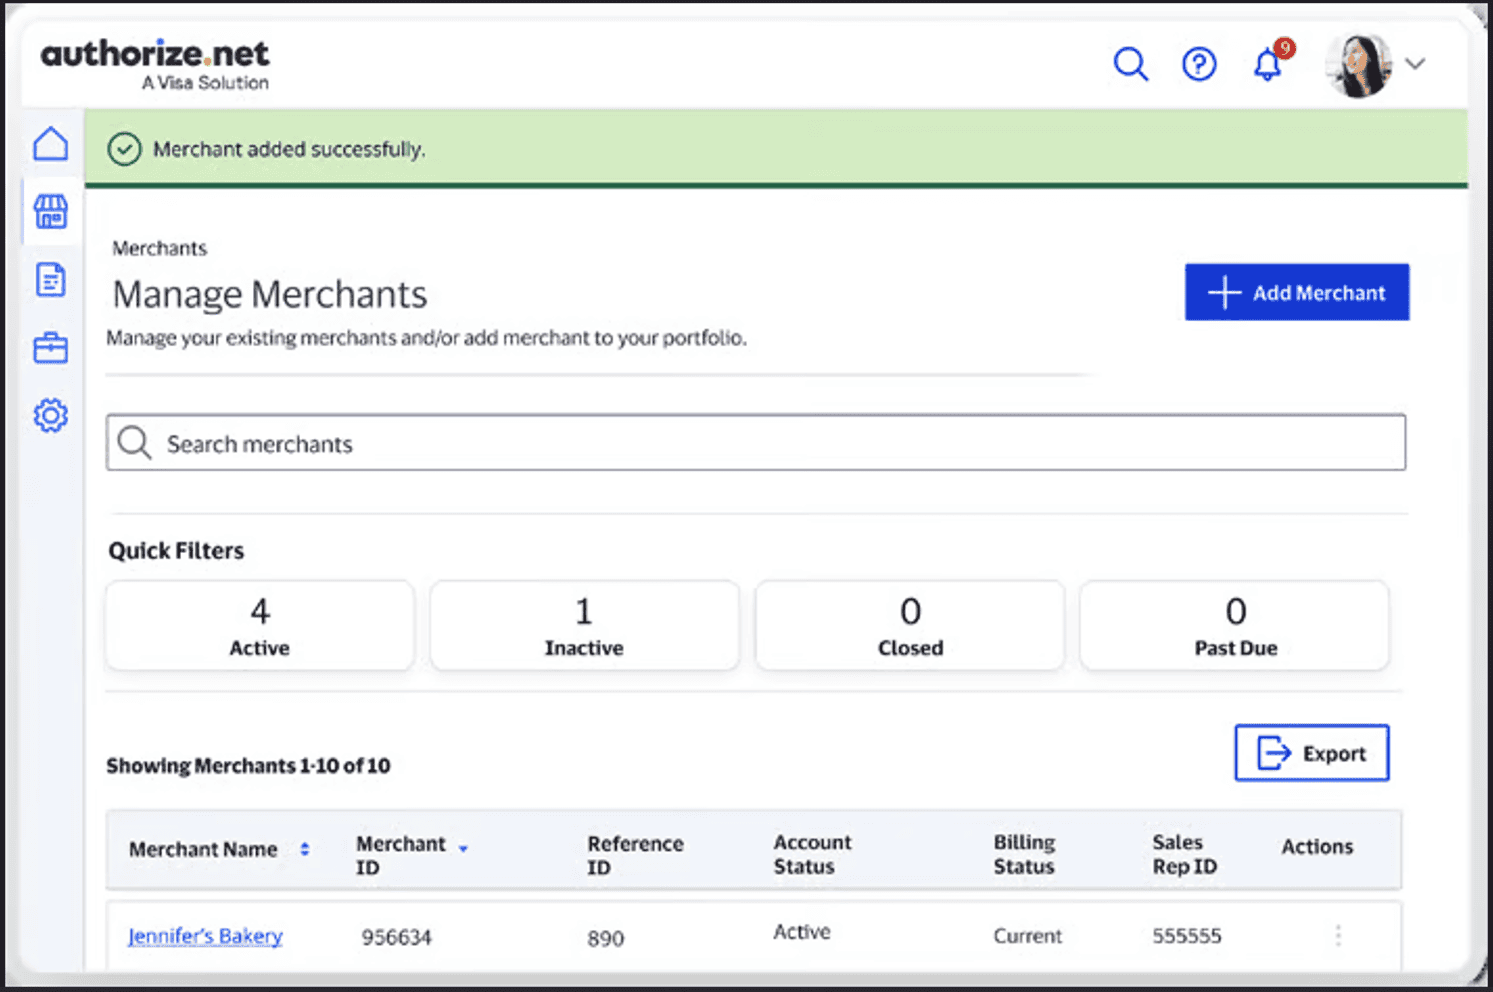
How to create multiple Authorize.Net accounts?
Here’s how you can create multiple authorize.Net Accounts.
Prerequisites and requirements
Before we dive into creating multiple Authorize.Net accounts, let me walk you through what you’ll need to have ready. Going in unprepared just slows everything down.
- Essential business information
- Valid business entity and EIN/Tax ID number
- Business registration documents and licenses
- Physical business address (no P.O. boxes)
- Valid business phone number and email
- Financial requirements
- Separate merchant account for each gateway account
- Banking information for settlements and billing
- Business credit history and financial statements
- Owner’s personal information and SSN
- Documentation checklist
- Business formation documents (LLC, Corp, etc.)
- Professional licenses (if applicable)
- Processing history (if you have it)
- Bank statements and financial records
The thing that surprised me most was how much documentation they actually want. It’s not just a quick form – they’re setting up a financial relationship, so they take due diligence seriously.
Got everything on the checklist? Great! Now let’s walk through the actual application process.
Multiple Authorize.Net application process
Here’s where I’ll walk you through the actual application process. The good news is that once you understand it for the first account, the process is pretty similar for additional accounts.
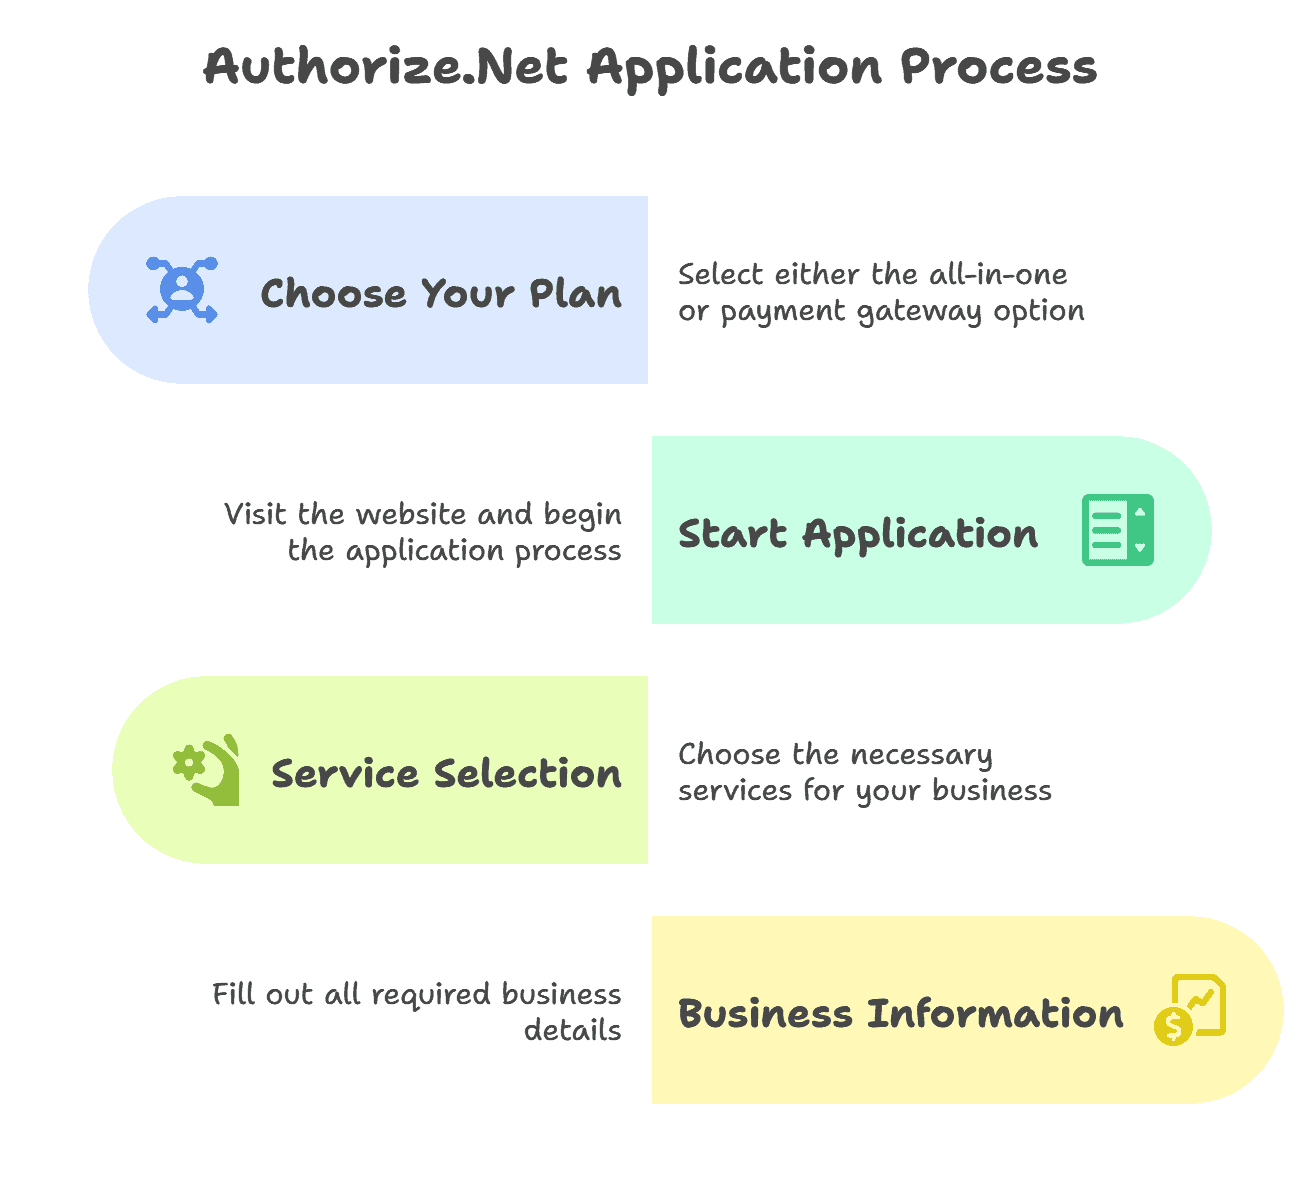
- Step 1: Choose your plan
- All-in-one option: Gateway + merchant account (ideal if you need everything)
- Payment gateway only: If you already have merchant accounts set up
- Step 2: Start the Application
- Go to the Authorize.Net website and click “Sign Up” or “Get Started.”
- You’ll need to submit a separate application for each account you want — there’s no bulk application process.
- Step 3: Service selection
- Select Payment Gateway for Credit Card Processing
- Choose Internet Merchant Account (if going All-in-One)
- Consider additional services like ARB, AFDS, and CIM
- Step 4: Business information
- Legal business name and DBA
- Business type and industry
- Physical address and contact information
- Estimated processing volumes
The application typically takes about 20–30 minutes per account if you have all documents ready.
Application submitted successfully? Here’s what happens next and how to get your accounts up and running.
Multiple Authorize.Net account setup steps
Once you submit your application, here’s what happens next. I’ll break this down so you know exactly what to expect.
- Application review process
- Initial review within 1–2 business days
- Possible request for additional documentation
- Underwriting review (can take 5–7 business days)
- Final approval notification
- Account activation
- You’ll receive an activation email with:
- Login credentials for the Merchant Interface
- Instructions for account setup
- Links to helpful resources and tutorials
- Contact information for support
- Initial configuration
- Log in to the Merchant Interface
- Verify your account information
- Set up user accounts and permissions
- Configure basic security settings
I always recommend activating each account as soon as you get the email – the activation links do expire after 24 hours.
Before you get too excited about your shiny new accounts, let me give you a reality check about what you’re actually signing up for.
Common issues with Authorize.Net accounts
Let me be straight with you – managing multiple Authorize.Net accounts is way more complex than it looks on paper. Here’s what you’re really getting into.
- Customer data re-entry problem:
- Your customers have to enter their payment info separately for each account.
- CIM doesn’t share data between accounts, so if someone shops with both your premium and budget brands, they’ll be entering their card details twice.
- It’s frustrating for customers who think they’re dealing with one company.
- Administrative overhead: Everything gets multiplied. You’ll be:
- Logging into multiple dashboards daily
- Managing separate user permissions for each account
- Handling individual compliance requirements
- Reconciling transactions across different systems
- Dealing with separate vendor relationships
What used to be a 5-minute check becomes a 30-minute process across multiple accounts.
- Integration development complexity: Your dev team needs to build separate integrations for each account. That means:
- Multiple API credential sets to manage
- Separate code paths for different business units
- Complex routing logic for transactions
- Different error handling for each account
- More testing environments to maintain
- Cost escalation: Monthly fees, transaction costs, and compliance expenses multiply by your account count. Plus, hidden costs like extra development time and increased administrative work add up quickly.
- No unified reporting: Authorize.Net doesn’t provide a single dashboard for multiple accounts. You’re stuck manually collecting data from each account to get a complete business picture.
- Credential management: Tracking multiple Login IDs, Transaction Keys, and Signature Keys becomes a nightmare. Mix up credentials between accounts, and you’ll spend hours debugging mysterious integration failures.
- No cross-account functionality: Can’t share customer profiles, can’t move transactions between accounts, can’t get unified analytics. Each account operates in complete isolation, even when they’re all yours.
The bottom line? You’re not just managing payment processing anymore – you’re orchestrating a multi-account payment ecosystem that requires significantly more time, resources, and attention than a single account setup.
I know that sounds overwhelming, and honestly, it can be. But here’s the game-changer that makes managing multiple accounts actually manageable.
How Putler helps manage multiple Authorize.Net accounts
Putler is a multichannel analytics platform that consolidates data from multiple payment gateways, including Authorize.Net, Stripe, and PayPal, into one unified dashboard.
It provides real-time transaction insights, advanced customer analytics, and automated reporting, eliminating the need to switch between multiple platforms to track your business performance.
Now, let’s talk about how Putler transforms your reporting capabilities.
The unified dashboard solution
Remember how I mentioned that one of the biggest headaches with multiple Authorize.Net accounts is having no centralized reporting?
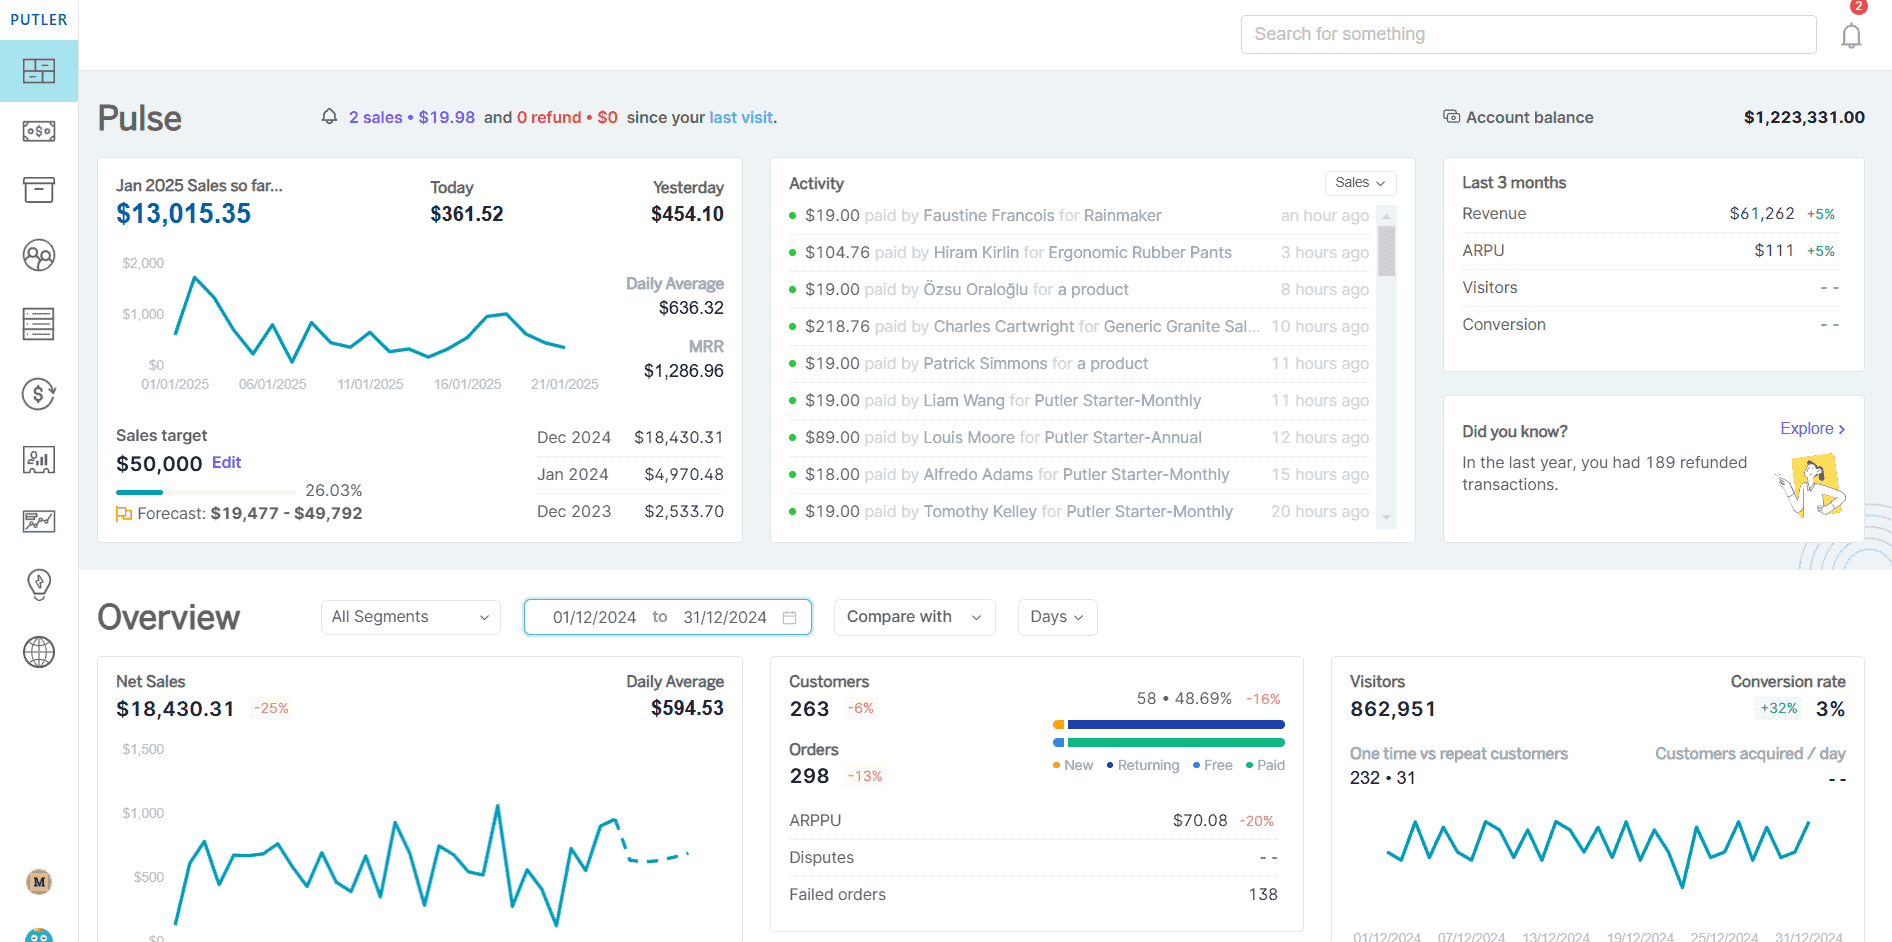
Well, that’s exactly where Putler shines. Putler combines all Authorize.Net payments into one central view.
What Putler does: Putler connects to all your Authorize.Net accounts and pulls transaction data from each one.
Instead of logging into Account A, then Account B, then Account C to get your daily numbers, you just open Putler and boom — everything’s right there in a single dashboard.
Here’s what Putler syncs in real-time:
- The platform automatically syncs data from all your accounts, so you’re always looking at current information.
- No more manual spreadsheet work or trying to remember which account had what numbers.
Consolidated reporting that actually works
Putler cuts down reporting time by over 80% by consolidating all your Authorize.Net data into one intuitive dashboard.
Instead of spending hours jumping between multiple account dashboards, Putler transforms scattered data into actionable insights.
Complete business overview
- View total transaction volume across all accounts
- See combined revenue metrics
- Track performance trends across your entire payment ecosystem
- Compare account performance side-by-side
Multi-channel management made simple
Putler isn’t just for Authorize.Net — it handles multiple payment gateways, which is perfect if you’re using different processors for different accounts.
- Payment Gateway Integration:
- Authorize.Net accounts
- Stripe, PayPal, Braintree integration
- Multiple currencies support
- Different shopping carts and platforms supported
Advanced analytics you can’t get elsewhere
Authorize.Net gives you basic reports. Putler gives you the full picture — detailed insights, trends, and clarity you can act on.
- Customer Intelligence
- RFM segmentation into 11 distinct customer segments
- Customer lifetime value calculations
- Enriched customer profiles with demographics and activity
- New vs returning customer analysis
- Customer behavior tracking and insights
- Product Performance
- Top-selling products leaderboard
- Product revenue contribution analysis (80/20 split)
- Product performance trends and tracking
- Price range analysis by product performance
- Refund rate tracking per product
- Geographic product performance insights
Time-saving features
Let’s talk about the practical stuff that saves you hours every week.
- Instant Search: Find any customer, order, or product across all accounts in seconds.
- Automated Reports: Set up recurring reports combining data from all accounts.
- Team Collaboration: Share dashboards with marketing, finance, and other teams.
Putler eliminates the 5-minute manual process of finding orders and issuing refunds, reducing it to just 5 seconds.
This time savings alone can free up 2–3 hours weekly for support teams.
By consolidating data from 17+ payment gateways into one dashboard, businesses save the equivalent of a full-time employee’s work.
Cost and efficiency benefits
- Reduced administrative time: Instead of spending 30 minutes checking multiple dashboards, it’s 5 minutes in Putler.
- Better decision making: Unified data helps you spot trends and opportunities for higher revenue.
- Export capabilities: Export everything as CSV files with one click instead of manual compilation.
Here is how you can connect multiple Authorize.Net accounts with Putler.
The bottom line
Managing multiple Authorize.Net accounts doesn’t have to be a constant headache. Putler essentially gives you back the unified dashboard that Authorize.Net doesn’t provide natively.
It’s not going to solve every challenge of multiple accounts, but it tackles the biggest one – getting a clear picture of what’s actually happening across your entire payment ecosystem.
FAQs
Can I share login credentials between multiple Authorize.Net accounts?
No, each account requires unique login credentials and API keys. Accounts operate independently with no shared access.
What is multiple Authorize.Net pricing if I manage more than one account?
Each account costs $25 monthly plus transaction fees. Multiple accounts multiply these costs – three accounts would be $75/month in gateway fees alone.
Can customers use saved payment info across different accounts?
No, customer payment data is stored separately per account. Customers must re-enter their information for each account.
Is there a limit on how many accounts one business can have?
There’s no official limit. Businesses can create multiple accounts for different divisions or purposes as needed.
What’s the main difficulty with multiple accounts?
Managing separate dashboards and consolidating data manually, since there’s no unified reporting across accounts.
- Manage Multiple PayPal Accounts Easily – Best Methods & Tools (Updated Guide 2025)
- Multiple Stripe Accounts: Ultimate Guide to Managing Stripe for Multiple Businesses</li>
- Multiple Shopify Stores: Step-by-Step Guide for Managing Multiple Shopify Shops from One Place
- BigCommerce Multiple Stores: Setup, Tools & Pro Tips
- How to Manage Multiple WooCommerce Stores Like a Pro